Key Takeaways
- Apple’s Guided Access feature is an effective child lock for iPhones and iPads, allowing parents to restrict access to apps and features.
- Guided Access can be customized to disable hardware buttons and touchscreen, reducing the chances of accidental navigation.
- To set up Guided Access, go to Settings > Accessibility > Guided Access to enable and customize the settings according to your preferences.
Handing an iPhone or iPad to a child affords parents a few minutes of quiet — but also risks an embarrassing video call to your boss or a toddler-initiated Amazon order. Despite having a slightly odd name, Apple’s Guided Access feature is effectively a child lock for Apple devices like your iPhone or iPad. It allows you to lock your iPhone or iPad into a single app, such as Disney+ when watching a video, so that your little ones can’t access other areas of your devices. It also means they can’t accidentally press to get out of the app either, hopefully reducing the number of times you have to reload Peppa Pig or Paw Patrol.
Guided Access is for handing over a device to a child temporarily, which is different from Parental Controls meant for a child-owned tablet or phone. When iOS 18 launches in September 2024, iPhone and iPad users can also hide and lock specific apps, another handy feature parents may want to use.
Best Apple iPad tips and tricks: A masterclass in managing your tablet
We’ve rounded up the best iPad and iPad Pro tips and tricks to help you get the most from your Apple tablet.
What is Guided Access on iPhone and iPad?
Guided Access is a child lock for iPhone and iPad
Guided Access is a mode on iOS that lets you keep your device stuck on one app. It’s perfect for making sure your kids stay in their lane, not wandering off into other apps or accidentally calling someone. You can even slap a timer on to keep screen time in check.
It’s also super handy because you can pick and choose what your kiddo can mess with in each app. With Guided Access on, the screen stays exactly as you set it, no matter how much they tap or poke around. You can even block off parts of the screen.
Guided Access isn’t the same as Parental Controls. While Guided Access is all about temporarily sharing your device without the little ones going rogue, Parental Controls are more for devices that are all theirs, all the time.

How to set up an Amazon Fire Kids tablet for your child
Learn how to navigate the Parent and Kids dashboards on your new Fire Kids tablet, to make it safe and easy for them to use.
How to enable Guided Access on iPhone or iPad
Turn on the ability to child-lock your device
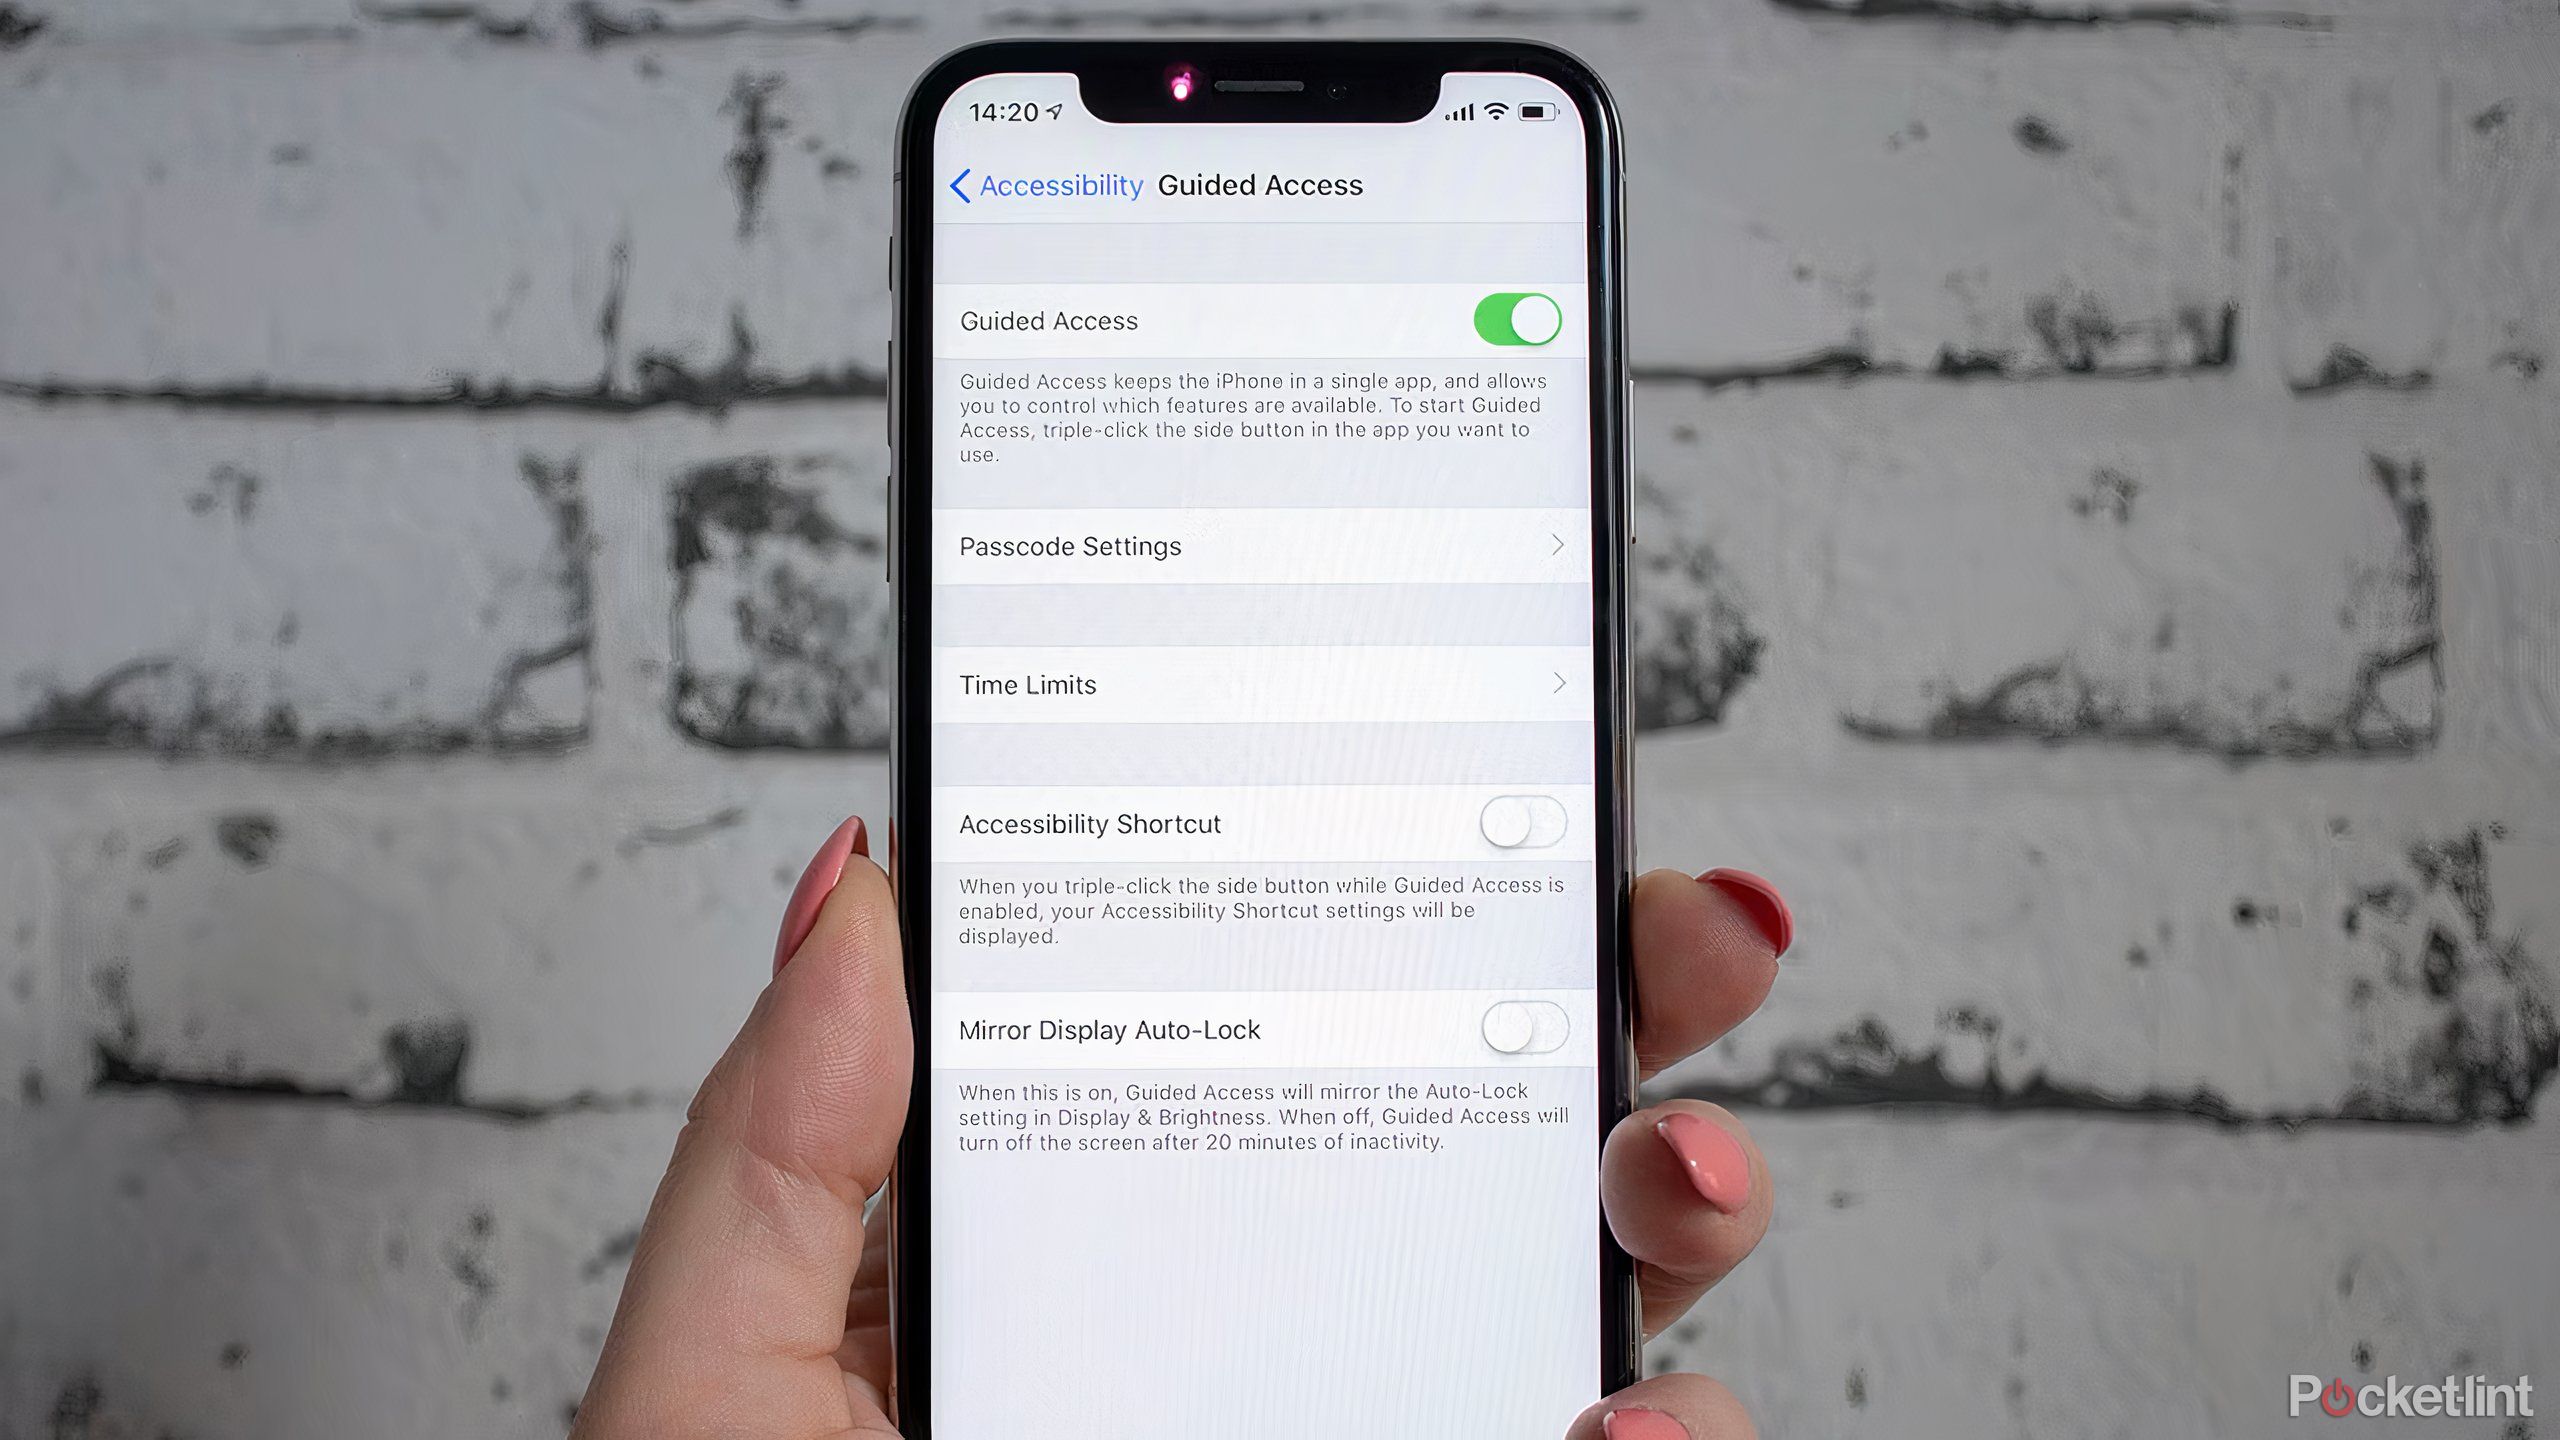
Before using Guided Access, you need to enable this feature in Settings. To turn on Guided Access, follow the steps below on an iPhone, iPad or iPod Touch:
- Open Settings.
- Tap on Accessibility.
- Scroll down to Guided Access within the General section.
- Toggle Guided Access on.
- Next, you’ll need to set a passcode. This code gets your phone or tablet unlocked, so be sure to use a code that you will remember. Tap Passcode Settings, then tap Set Guided Access Passcode. Enter the desired passcode, then enter it again to confirm.
- If desired, turn the toggle on under Face ID or Touch ID to use facial recognition on compatible devices instead of a password to exit the Guided Access Mode.
How to start Guided Access on an iPhone or iPad
All it takes is three taps of the side button and tapping Start on the screen
Once you’ve enabled the Guided Access in Settings, you can turn that child lock on and off whenever you need it. To begin a Guided Access mode session:
- Open the desired app that you want to remain on the screen.
- Triple-click the side button (the same button that puts the iPhone or iPad into sleep mode). If you are using an iPhone 8 or earlier, you’ll triple-press the home button instead.
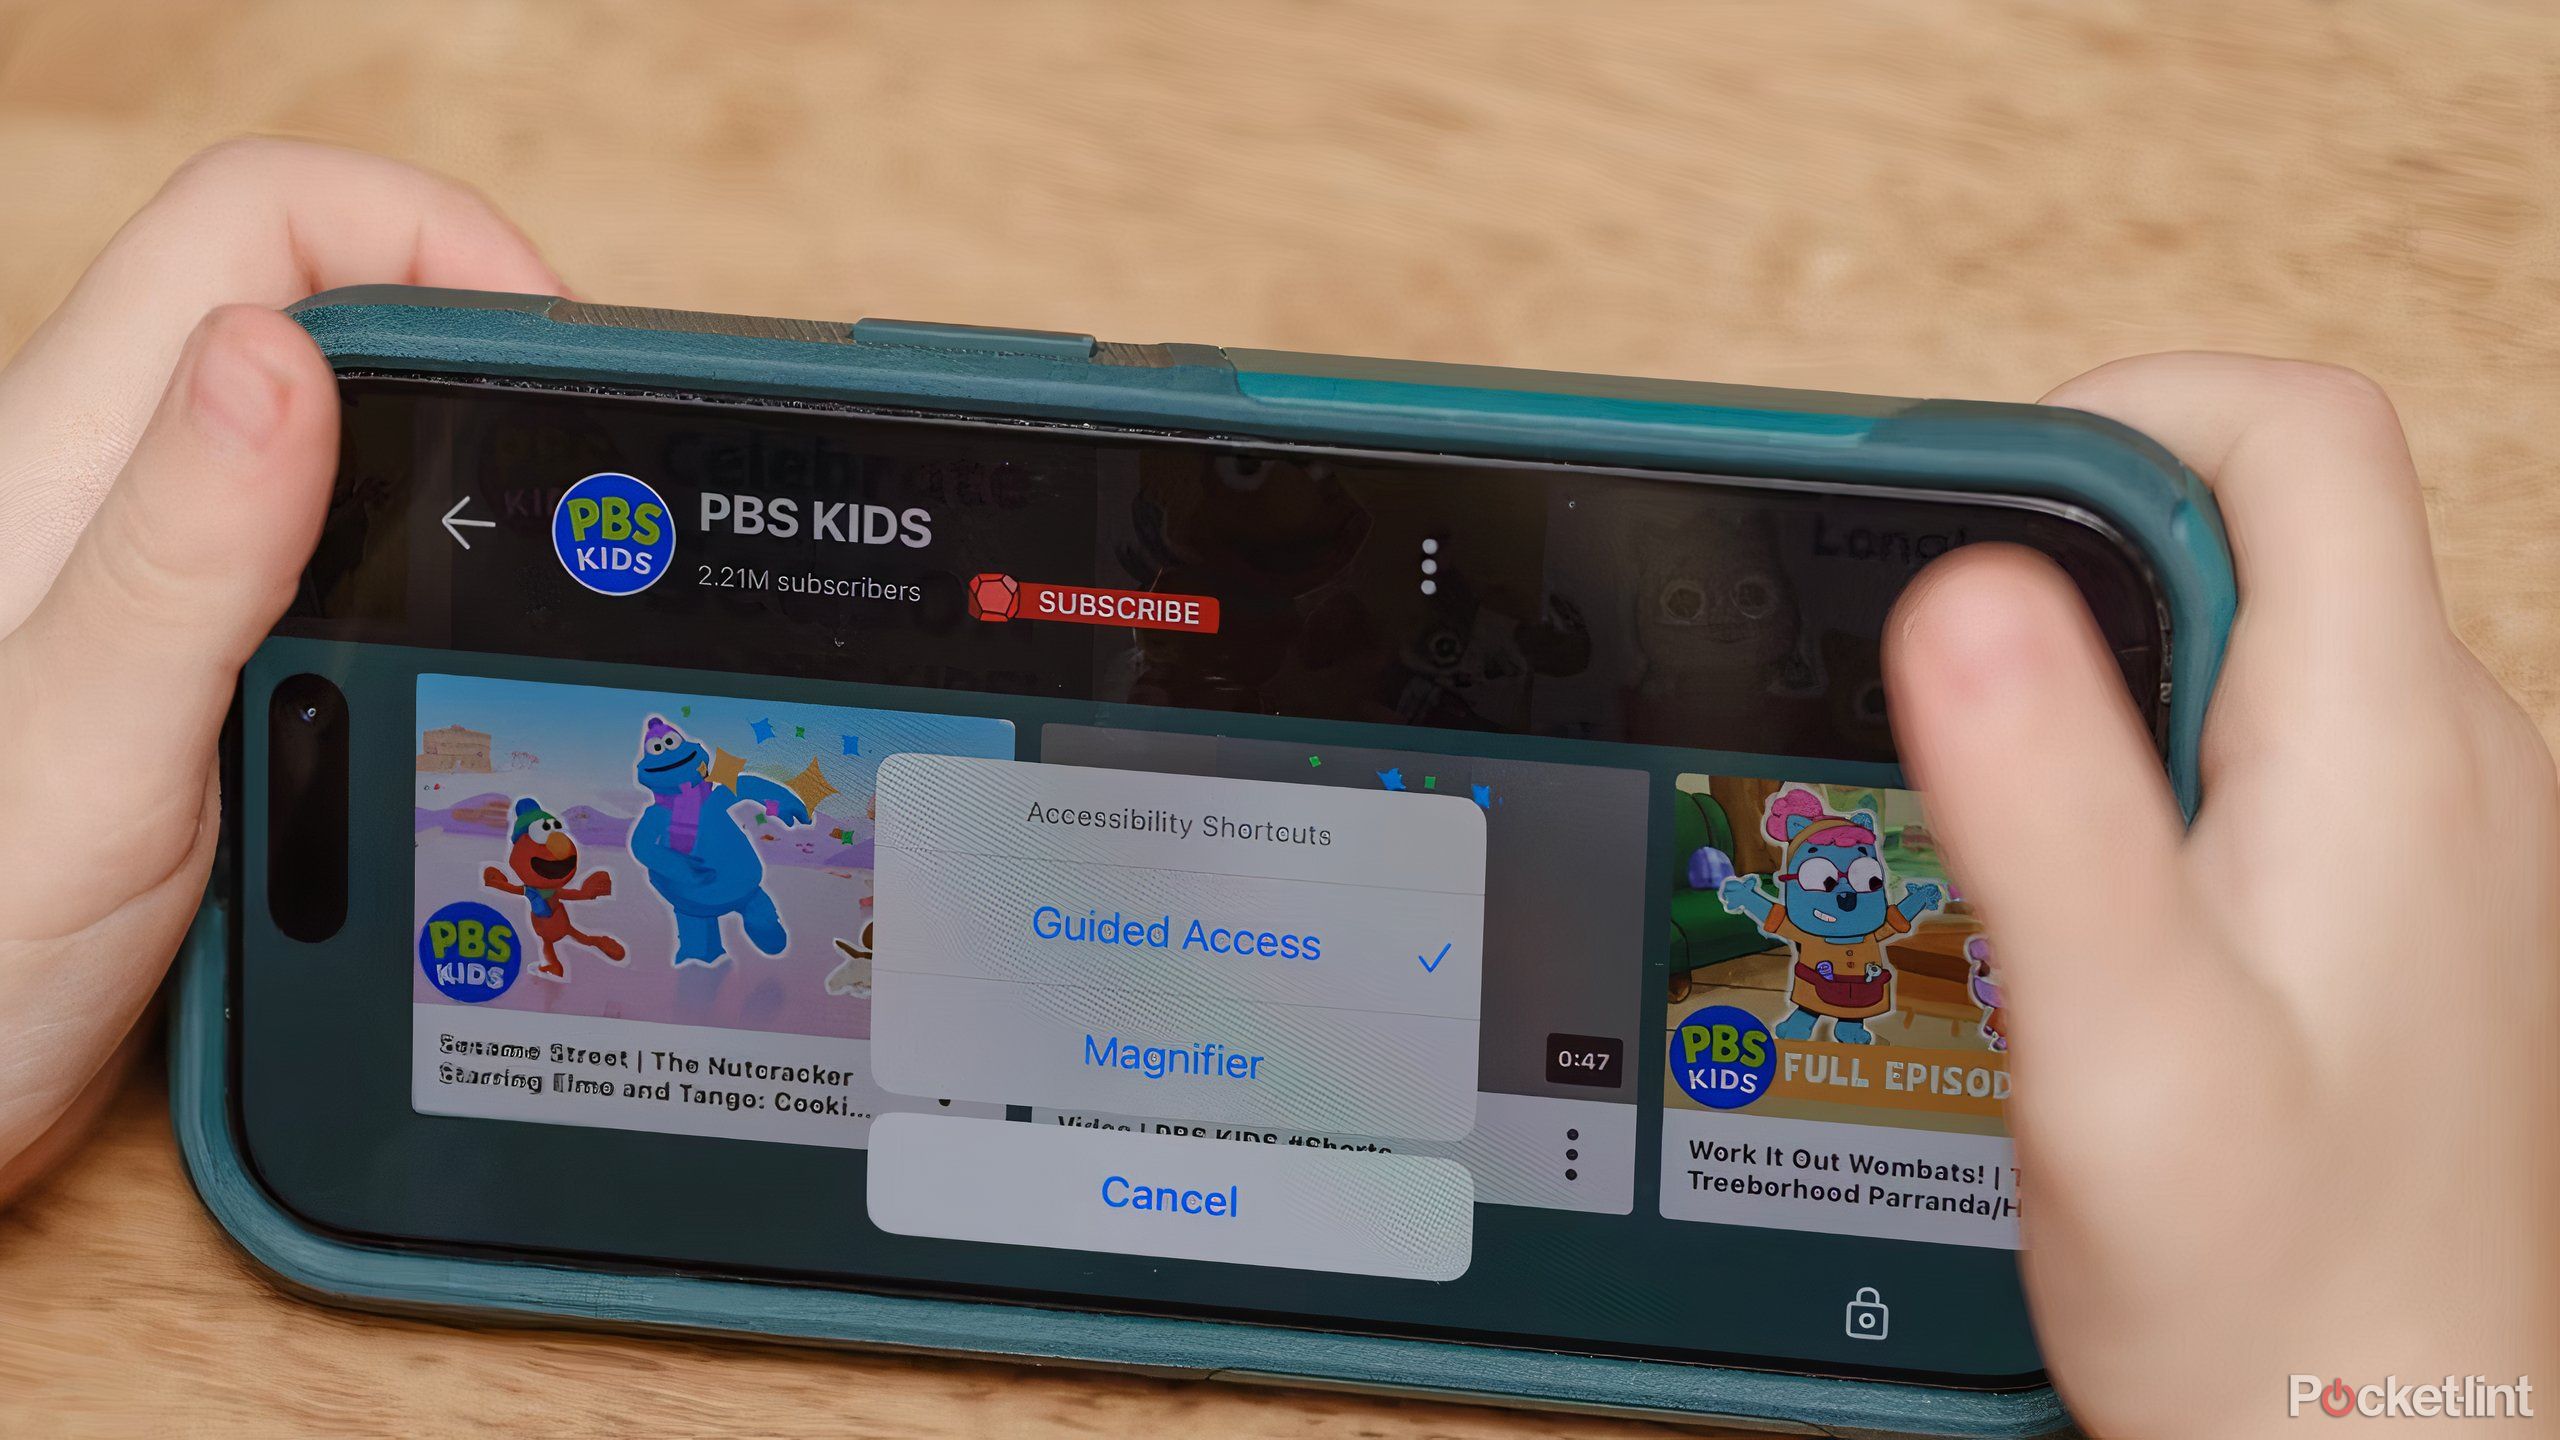
- In the Accessibility Shortcuts menu that pops up, tap on Guided Access.
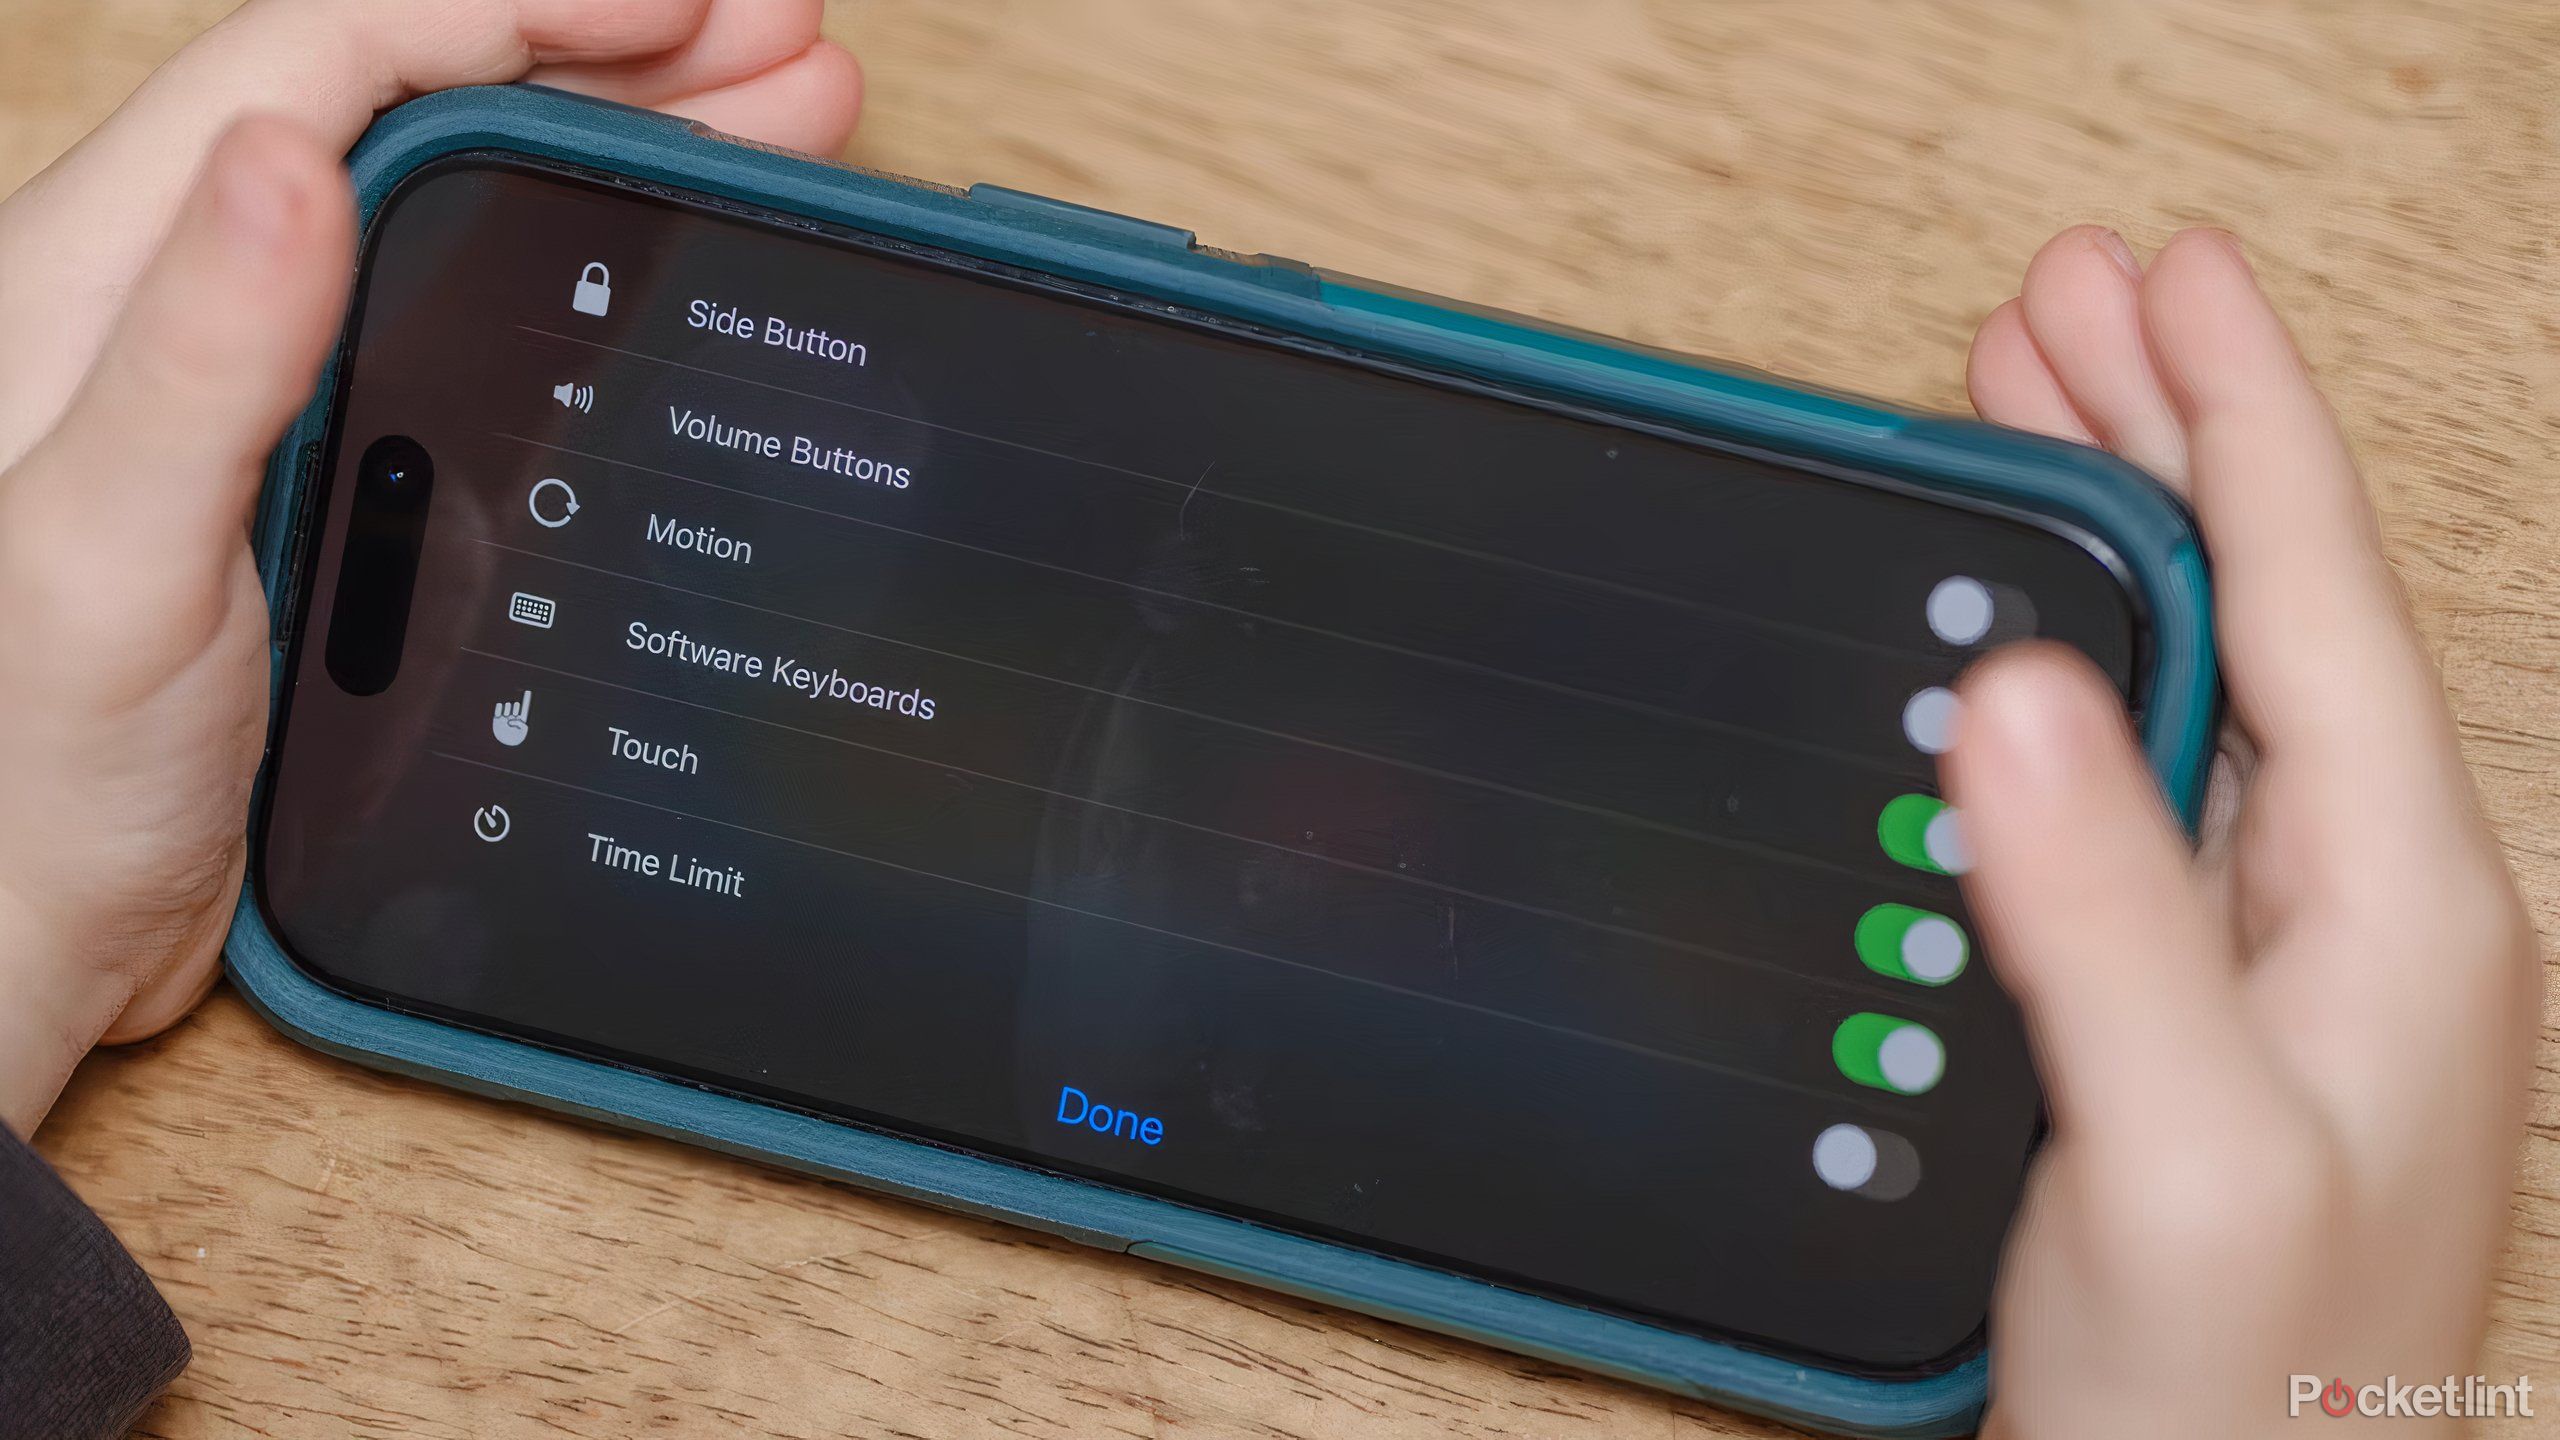
- Optional: If you want to disable some options, like the volume buttons or prevent the screen from rotating, tap options and use the toggles to activate or deactivate different settings. Any changes made here will be remembered the next time you use Guided Access on the same app.
- Optional: Use your finger to circle parts of the screen that you do not want the child to access. For example, on YouTube Kids, you can disable the back button so they are locked into the same video.
- Once your settings are to your liking, tap Start. The iPhone or iPad is now locked into that app.
On iPhone 15 Pro or iPhone 15 Pro Max, you can set the Action Button to launch Guided Access instead. Go to Settings > Action Button > Accessibility > ‘Choose a feature’ > Guided Access.
Best kids tablet: Parent approved and reviewed
The best tablets for kids are durable, educational, and entertaining.
How to end Guided Access or unlock an iPhone stuck on Guided Access
Alright, so you’ve got your device in lockdown mode, and now you want out? Easy.
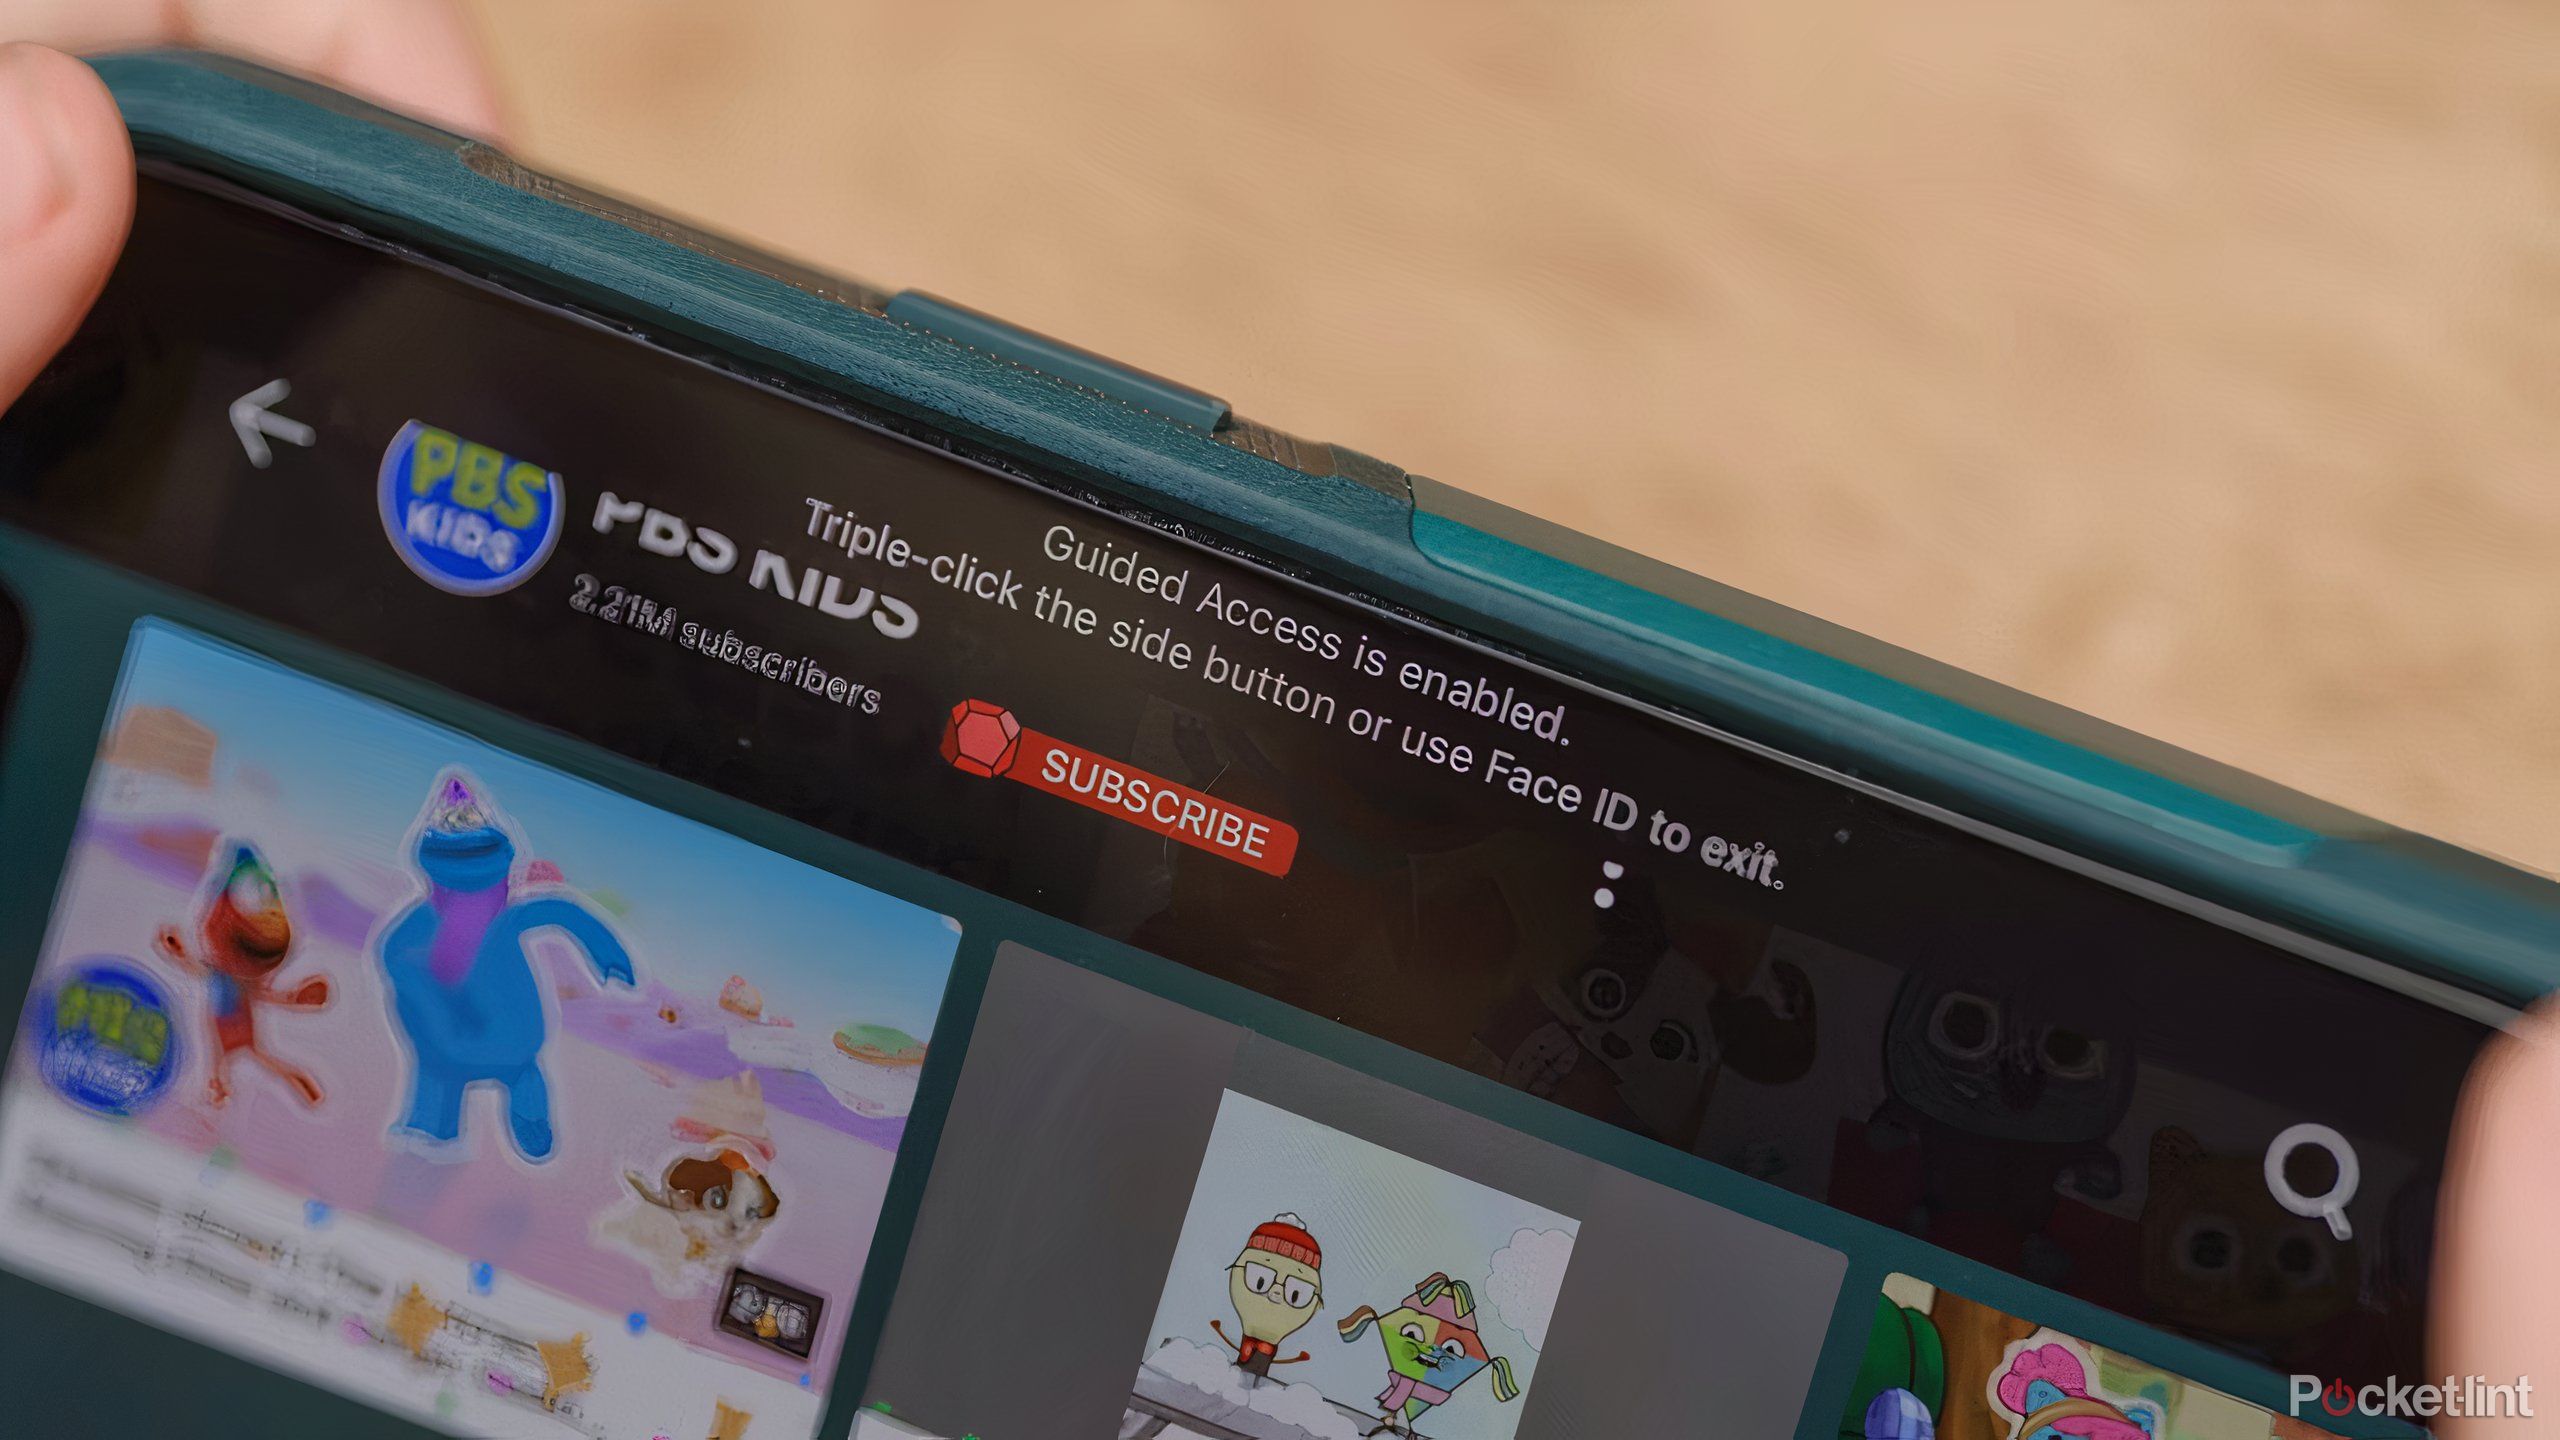
To exit the Guided Access Mode, just triple-click the side button, or the home button on the iPhone 8 or older models. Next up, punch in your Guided Access passcode. You can also double-tap the home or side button to use Touch ID or Face ID.
Once you’re in, just hit the End button chilling in the top left corner of your screen. Boom, you’re back in control, and your device is no longer in kid lock mode.

Best kids’ headphones: Gentle sound for little ears
The best headphones for kids are wireless, easy to connect, and have volume limiters in fun colors for kids.
How to Adjust the Guided Access Settings
Parents can also disable volume or prevent the screen from rotating with the Guided Access Options
The settings for Guided Access are in two locations, which can make it difficult to find the different customization options. The options for the passcode, time limits, and turning the feature on or off are in Settings > Accessibility > Guided Access.
But, within each app, you can also customize how you want Guided Access to work. For example, you can disable the volume buttons or allow them to adjust the volume themselves. To find these settings, you’ll open the app, triple-click the side button, then instead of tapping Start, tap Options first. Use the toggles to adjust the different options, then tap Done, then hit Start.
Here’s a table that breaks down the settings available in Guided Access and what they do. Keep in mind, the options you see can vary depending on the app you’re setting up for Guided Access. For instance, the Dictionary Look Up option won’t show up when you’re on Netflix, but it will be there in Safari.
|
Setting |
Function |
|---|---|
|
Sleep/Wake Button |
Disables the Sleep/Wake button on your device. |
|
Volume Buttons |
Disables the volume buttons. |
|
Motion |
Limits how your device responds to motion, including shaking and rotation. |
|
Keyboards |
Prevents the keyboard from appearing. |
|
Touch |
Stops the screen from responding to touch, useful for video apps like Netflix. |
|
Dictionary Look Up |
Enables the Look Up feature for selected text, available in certain apps like Safari. |
|
Time Limit |
Allows you to set a time limit for the Guided Access session. |
Trending Products

Cooler Master MasterBox Q300L Micro-ATX Tower with Magnetic Design Dust Filter, Transparent Acrylic Side Panel…

ASUS TUF Gaming GT301 ZAKU II Edition ATX mid-Tower Compact case with Tempered Glass Side Panel, Honeycomb Front Panel…

ASUS TUF Gaming GT501 Mid-Tower Computer Case for up to EATX Motherboards with USB 3.0 Front Panel Cases GT501/GRY/WITH…

be quiet! Pure Base 500DX Black, Mid Tower ATX case, ARGB, 3 pre-installed Pure Wings 2, BGW37, tempered glass window

ASUS ROG Strix Helios GX601 White Edition RGB Mid-Tower Computer Case for ATX/EATX Motherboards with tempered glass…


